I had just finished a chapter in my webcomic, but I didn’t draw it on my IPad like I usually do. I completed that chapter on my laptop, since I didn’t have access to my iPad until just recently, I didn’t want that to stop me from making digital art. So I decided to go through a learning curve on learning how to draw on the laptop and once I got comfortable I went on to work on the third chapter of my webcomic.
I used Krita to illustrate the third chapter and upon this I realised that it doesn’t matter what software you’re using it’s mainly about the technique you’re using to achieve your goal.
While creating my webcomic in Krita I followed the same workflow I did when I created chapters 1 and 2 in Procreate using my iPad. Of course there were major differences from the two applications like in Procreate it’s really simple to create a layer mask while in Krita it’s more complicated and because of that I did have to adjust my workflow a bit.
Before getting into this I want to state that my workflow is curated for a digital webcomic though I’ve seen people upload their traditional webcomics onto platforms like Webtoon. Another thing is that when I am working on a chapter I have my dimensions done in a comic page. Once I’ve completed all my pages done for the chapter I’m working on I then reformat it to fit into the dimensions of whatever webcomic platform I’m uploading to which in my case is Webtoon. So I’ll have two distinct files, one chapter done in a traditional comic page in case if I so happen to get my works published and the other file is in the format that the webcomic platform accepts. For me, I’m upload to Webtoon and as of now I have two comics uploaded and ended and two that I’m currently working on.
I would say the most important thing when making a webcomic is not the software, which depending on what software you have can give you added convenience like Clip studio paint, but even a humble software like perhaps MS paint can be used, it doesn’t matter. The most important thing is organization, layers and your software should allow you to add or specify what dimensions your canvas is.
So let’s get into it. Here’s my workflow on how I make my webcomics. I will be including a demo as well as using my own webcomic to help with understanding what I’m talking about.
So let’s say you’re finished with plotting, with the characters sheets, you know how you story is going to go. You’ve got the font you’re going to use for the speech bubbles, you know what brushes you’re using for the line art etc. You are either okay with doing hand drawn backgrounds or you might use ready 3d background or make you own in Blender. You’re ready to start you webcomic.
Step 1
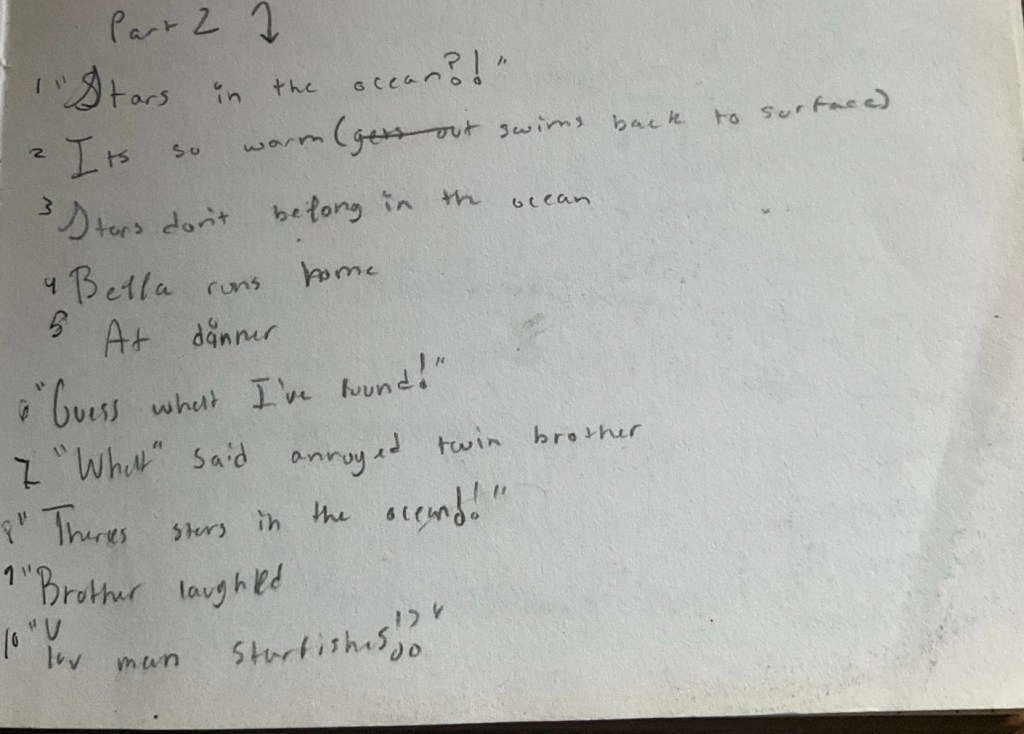
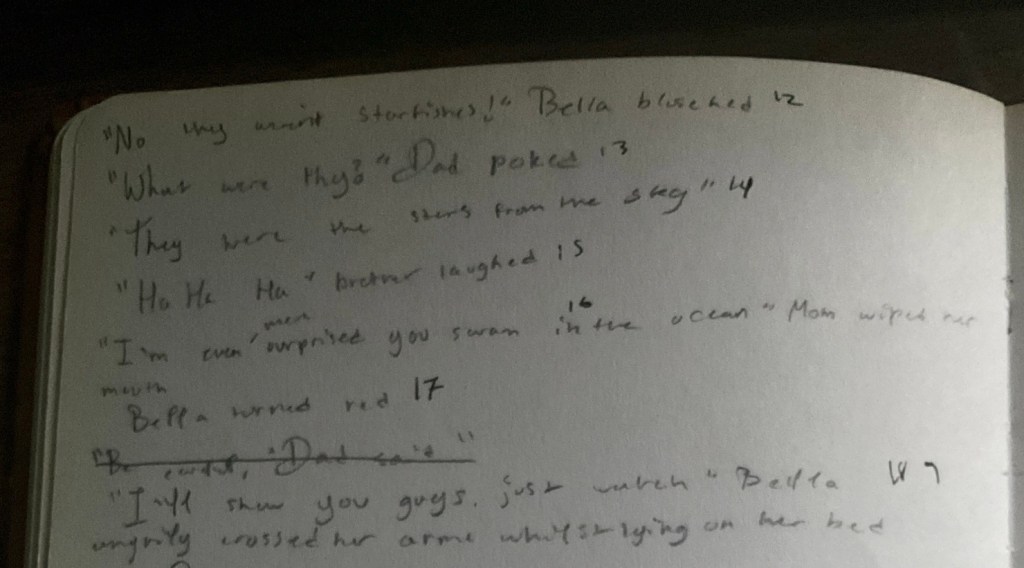
I do this part traditionally in my sketchbook or a dedicated notebook for my webcomic. Step 1 is making a script, this is where I write what is going to take place, who is talking etc, each line or verse is numbered. I would have the opening setting that I may or may not include in the actual webcomic, it’s just for my personal understanding, so the opening setting can be in the living room during sunset. I may also specify what I have in mind for a camera angle like for example, a character may be shouting in urgency, so I’ll put a note that the camera angle needs to be in front of the character.
Step 2
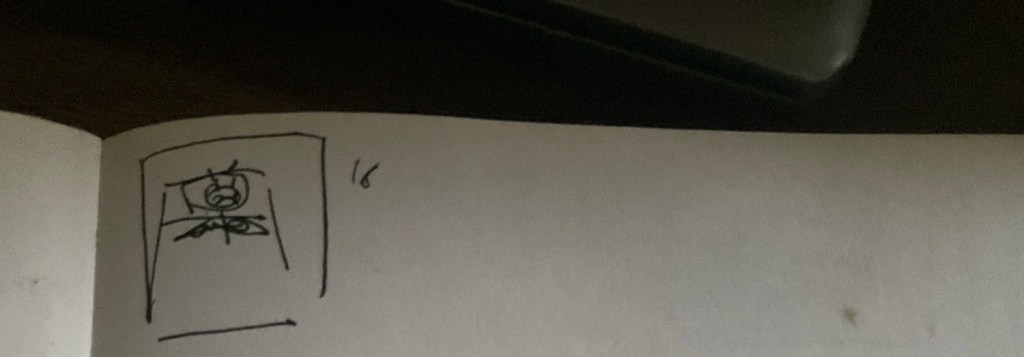
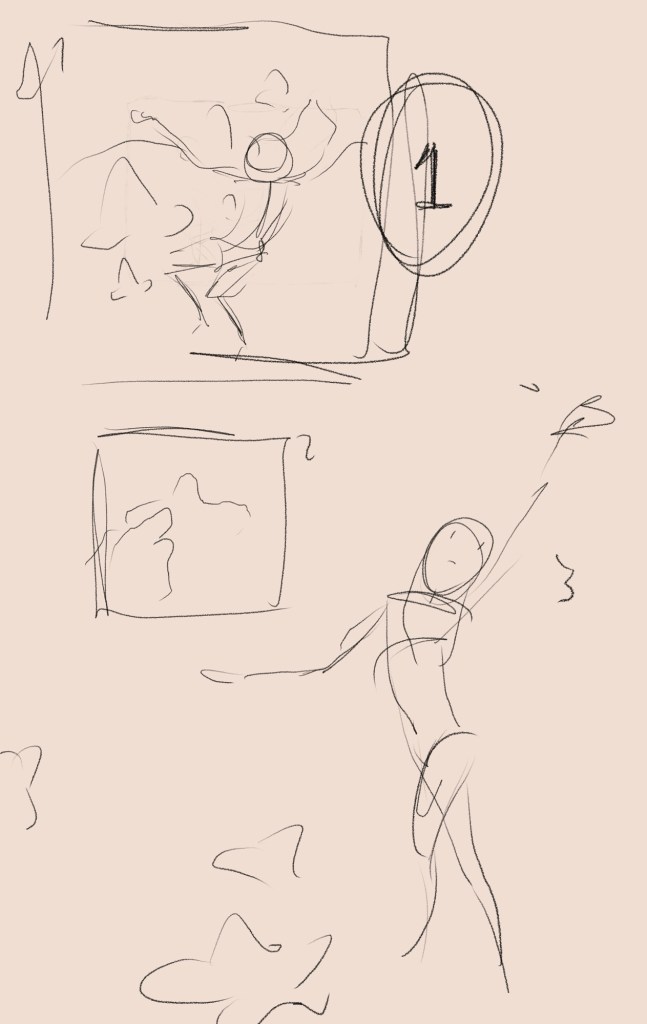
I also typically do this part traditionally in my sketchbook or a dedicated notebook, this is where I thumbnail each line of the script. This tells me approximately how many panels will be in the chapter. Also depending on the complexity of the line in the script it may have more then one panel attached to it. So let’s say line 10 is where the character is shouting in urgency, for the thumbnail sketch(es) I’ll thumbnail the character shouting and then add another panel connected to verse line 10 showing the character’s hand reaching out. So verse line 10 would have two panels, named 10.1 and 10.2.

Step 3
Now that my thumbnails are done and my script is done I move on completing my chapter digitally now. I create my canvas dimensions to the traditional comic page or at least what is according to Procreate, 6” x 9.5”. This is done on one layer, for this I thumbnail my webcomic on one layer according to the traditional thumbnails I did in step 2. I plan on what panels I’m going to use, I put in speech bubble figuring how the speech will look with the panels. This tells me how many pages the chapter will be.
Step 4
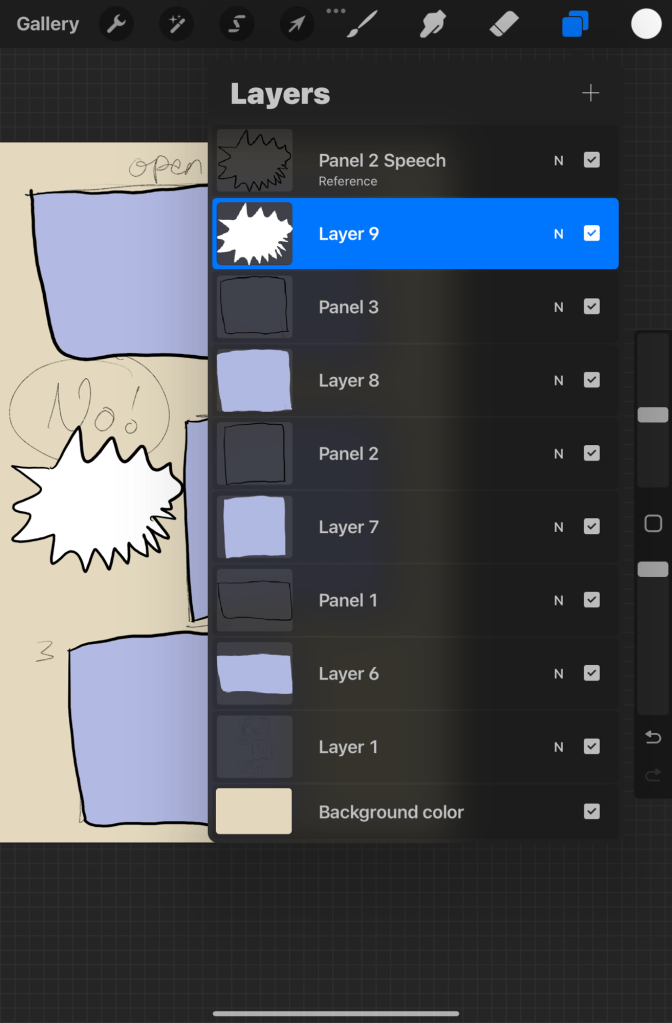
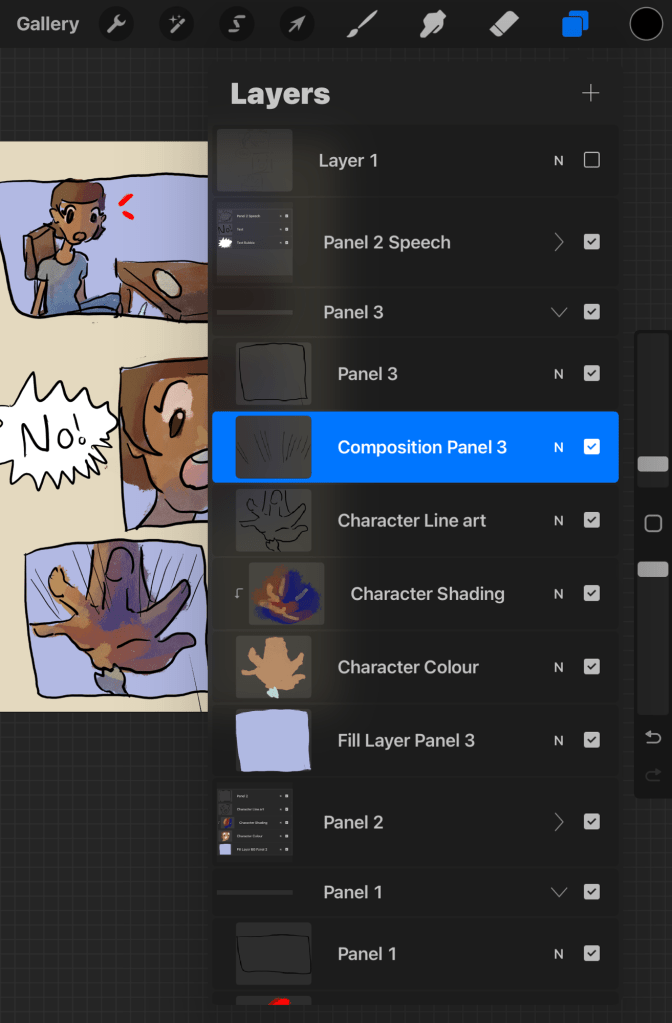
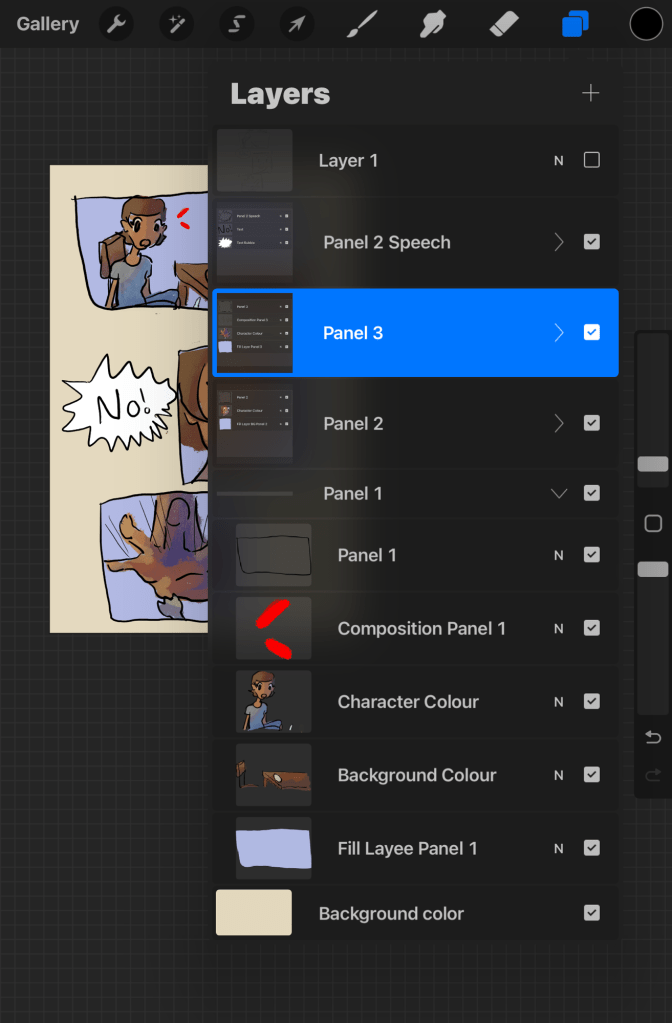
Now this is where you’ll really have to be organised, each layer must be named precisely. I typically start off by creating a layer for each panel according to the sketch layer. For this I will create a demo to help with better understanding.

Step 5
Then I create the layer for the speech bubbles and I name it according to its corresponding panel.

Step 6
Now this is when I start creating the contents for each of its corresponding panel, and group the two layers, the fill layer and the panel. To make things easier I fill the panel with a colour on a separate layer and then I group the layers and I be sure to name that group. I would then use the fill layer as a layer mask to ensure I don’t draw or colour outside the panel. Organisation is key!

Step 7
Be sure to name each layer to stay organised, this is where I start the drawing the line art for each panel. I start with the background if there is one, and I place the background layer in its corresponding group layer. I also do the line art for the character and I do type in the speech bubble as well.

Step 8
For the background, character and/or prop layers it would be comprised of various layers, the line art, the colour and the shading, I also do the same for characters and props like chairs using clipping masks when needed. Each layer is named.

Step 9
Now the last step for me would be to add the composition or extras, that is like setting the mood or giving extra information.
Step 10
This would be one of last steps before we reformat it into the acceptable canvas dimension for an webcomic platform. This last step would be to flatten all the background layers, all flatten the character layers. Even the text layers can be flattened but in my opinion that’s optional. So if one of your panels has both a background and characters you should have about 3 layers. One layer for the character, one layer for the background and one layer for the actual panel. Just be sure everything is organised to save you frustration later.
Step 11
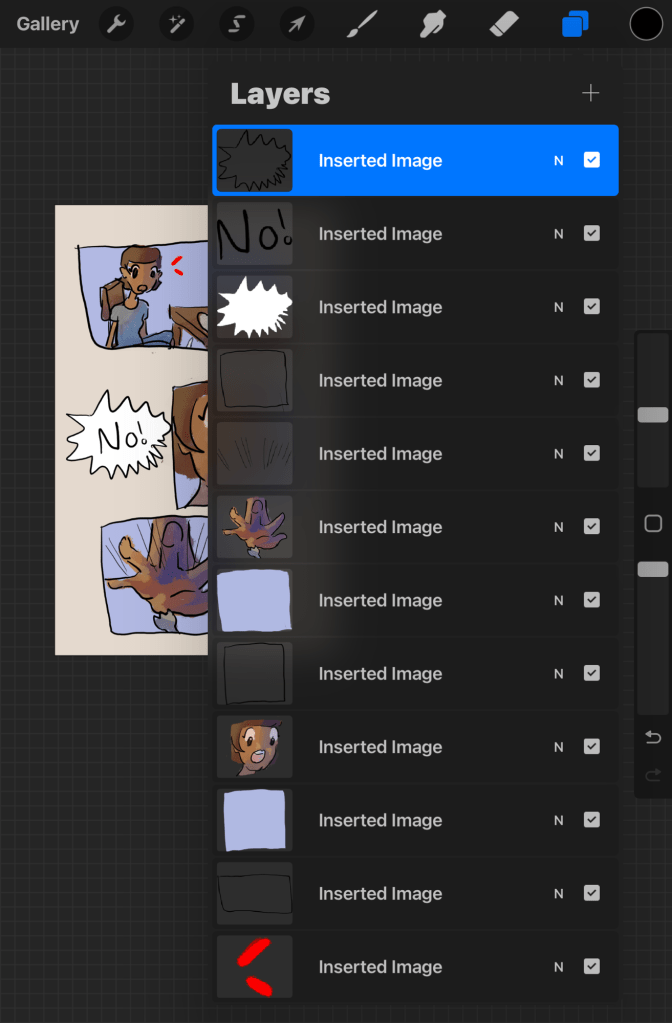
Export your layers as png files, make sure the background layer of the canvas is transparent. This is to export the layers to the new file which would be reformatted into the appropriate online webcomic platform dimensions.
Step 12
Now create another canvas with the dimensions that are set by the online webcomic platform. A single Webtoon page is 800 pixels by 1280 pixels. If you need multiple Webtoon pages just multiply the width which is 1280 pixels by x amount of pages you need.
Step 13
Place each layer that you exported onto that new canvas, go on and on until you finish. Think of it like this, you’re moving the panels around to make the readability more easier for the viewers since most of them would be reading you webcomic on a mobile device like a phone. This is why making sure that the layers were organised was key. You can also rename the layers if needed. Move the panels around so that your story flows. Be sure to place your title at the beginning too.Here is the demo and then I’ll show my actual comic for better understanding.

Step 14
You can add extras to help with establishing the mood, like changing the colour of the panel into a gradient or something like that as you can see with my comic ‘Stars in the sea’.
Step 15
Now that you’ve reformat it you can upload to the online webcomic platform that you’re using unless, perhaps that platform requires you to slice up the pages and then you can upload, Webtoon requires that and for me I use a website extension called croppy. Then I upload my chapter. After that you’re finished!
Once I was able to do a chapter of my webcomic in a totally different software like Krita it had taught me that really, or deepened my understanding, that it is not the tool that is special. Yes the tool may be more advanced or have added perks which creates more convenience but it is the skill of the person using the tool. The same goes here, it doesn’t matter what software you’re using to create a webcomic, as long as the software has the basics like layers, different brushes, customisation of the canvas size, you can create a webcomic. And that is what I did, I originally began creating my comics in Procreate, even up until recently, then something happened where I didn’t have access to my iPad but I did have a laptop. So I used my laptop to create the 3rd chapter of ‘Stars in the sea’.
I hope this little blog post was helpful, I tried my best explaining my personal workflow, which I curated through a lot of research before I began to upload my comics which I only have 2 public and finished. As for the other 2 I’m working on one and the other is on a long hiatus of a year… I just wanted to share my knowledge to make you comic creating process a bit more easier.

Leave a comment